The Goal of this article is to either get you to have Conflict Check results by Copying the new “Service Printout (Default) with Conflict Check” or adding Conflict Check results to your already heavily customised templates.
Note you can follow this process for adding any Detailed Report band into an existing template substituting the Conflict Check fields and Table with i.e. Additional Party information. The detailed report band also supports:

The Video below is split into Two Parts the first:
Go to Tools (Bottom Left) > Printout Templates (Top Left) and now tick the box next to Service Printout (Default) with Conflict Check then press Copy via the top right.
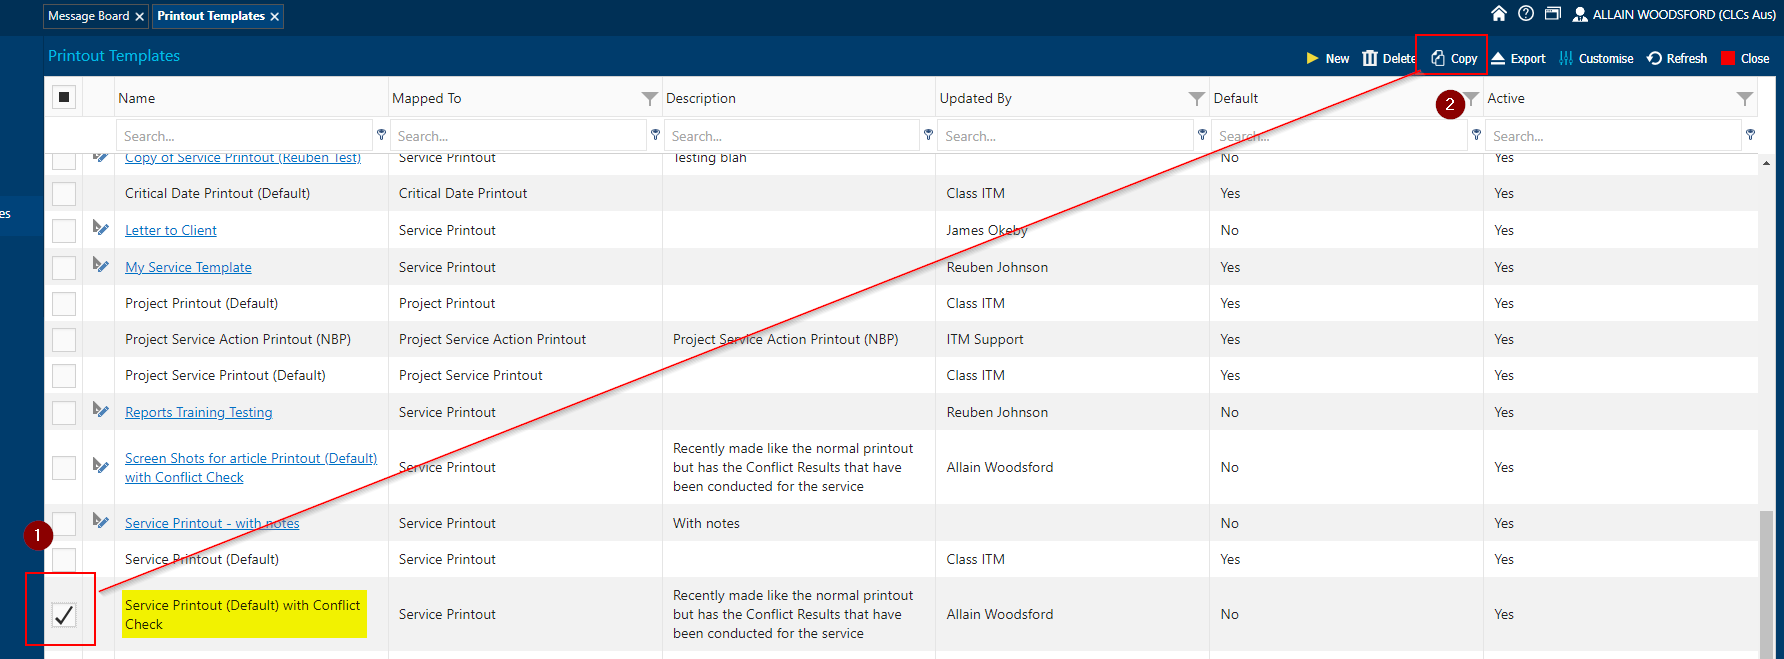
Look for your copied template it should be named something like “Copy of Service Printout (Default) with Conflict Check” left click on the hyperlink or blue text of this copied template. Wait for the Window to pop up then tick Default then save and close.

Your Printout Templates when you print service Details now come with the Conflict Check Results.
We suggest you copy you’re existing template and re-name it as a back up before making these edits (just in-case).
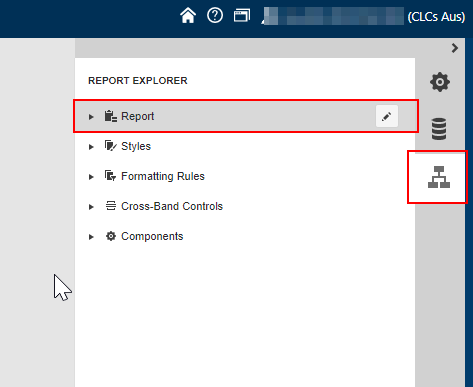
Open the template by pressing the Triangular Ruler and pencil icon / designer view next to the tick box.
In the report explorer via the right hand side left click on the highest level item called “Report” then press the edit button / pencil
Now press the Insert Detail Report band at the top of the properties of the overall Report
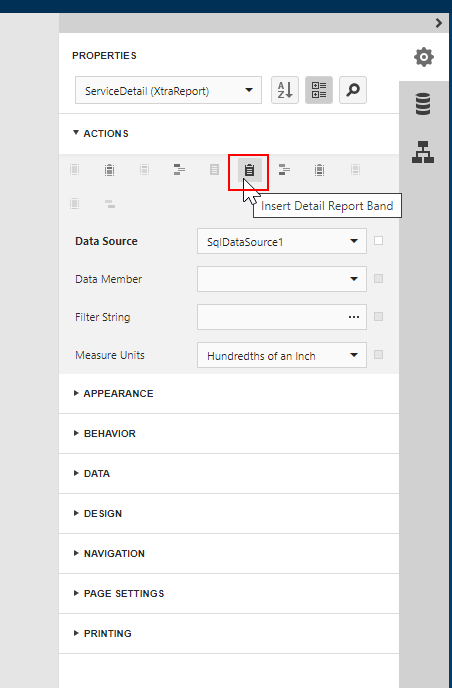
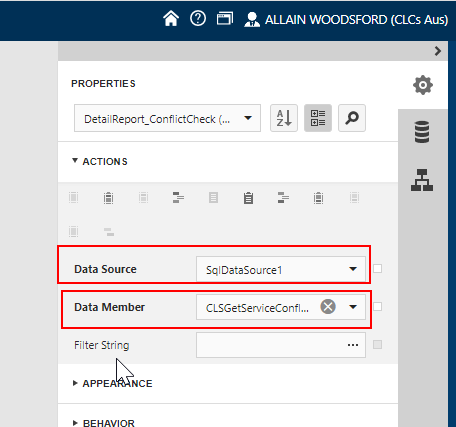
Now in the Report explorer assign the Data Binding and Data Source of the new detail Report Band and optionally re-name it to Conflict Check (under the design of the properties)

Now use Copy and paste via left clicking from the Report Explorer another detail report band such as Actions and copying the: Heading and Two Tables over to your new detail report band to save some time.

Above we are left clicking on another detail report band via the report explorer and pressing copy on the top left.
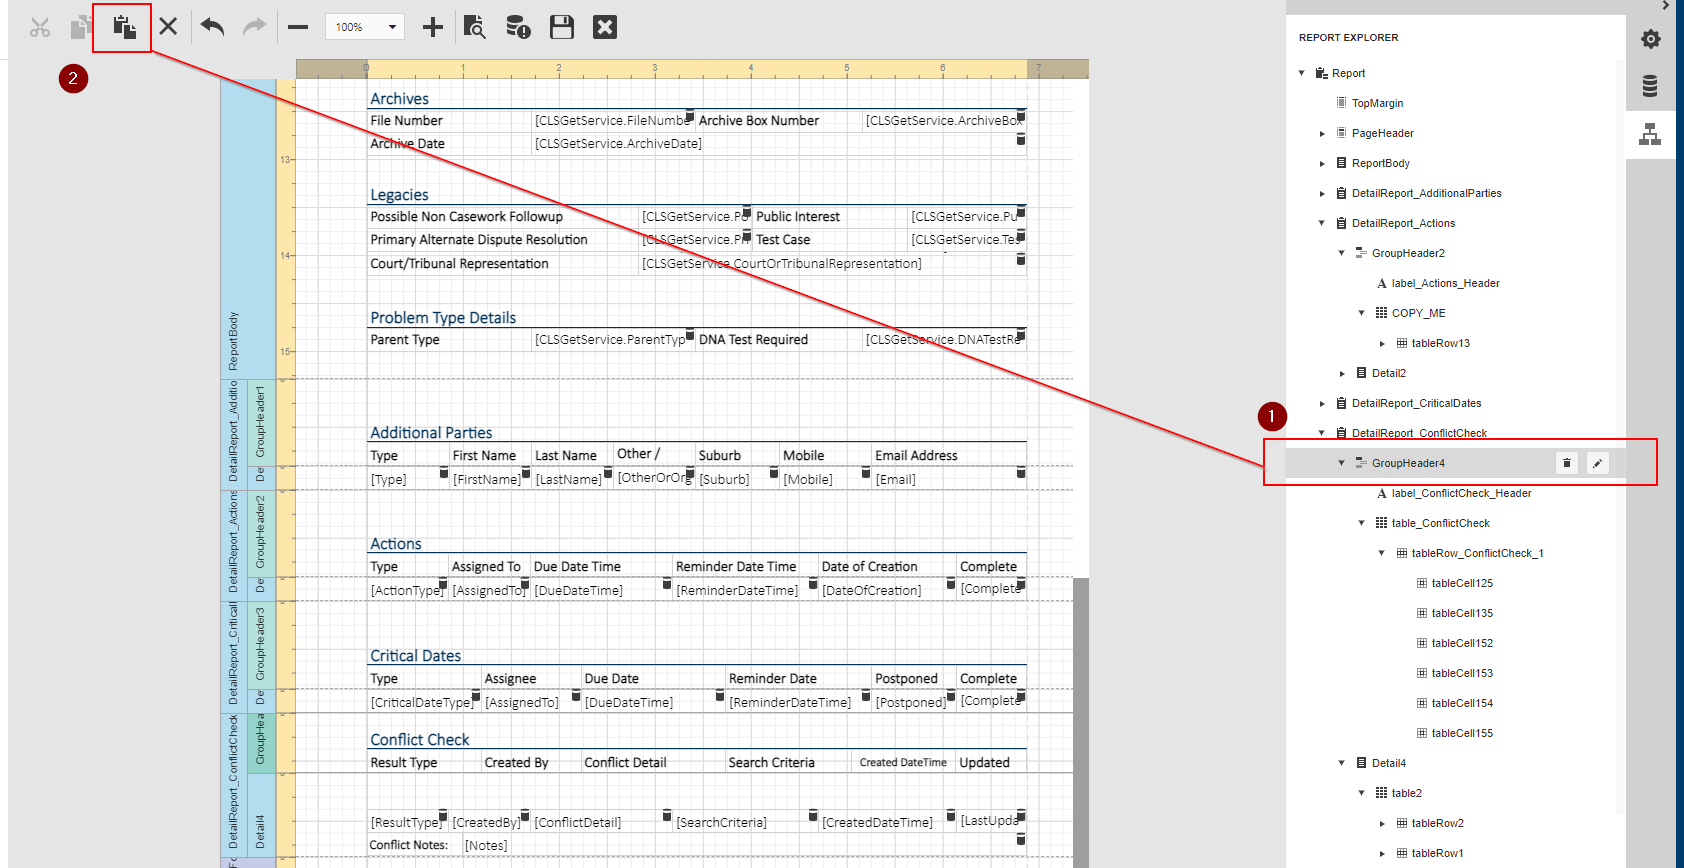
Above is using the paste button while clicking on a new group header band for example and pasting a table, repeat for the other tables to mirror a Group header band such as Actions, Critical Dates etc.
The Final Step is to edit each field and replace with fields from Conflict Check. Review this page on how to go about that Printout Template basics Adding Modifying and Removing Standard Fields or go to minute 10:45 on the video above.