Printout Template basics Adding Modifying and Removing Standard Fields

Once you are editing an existing default template that you have copied we will cover how to modify, add new fields and delete the one’s you might not need that are sitting within said template.

Deleting a Field:

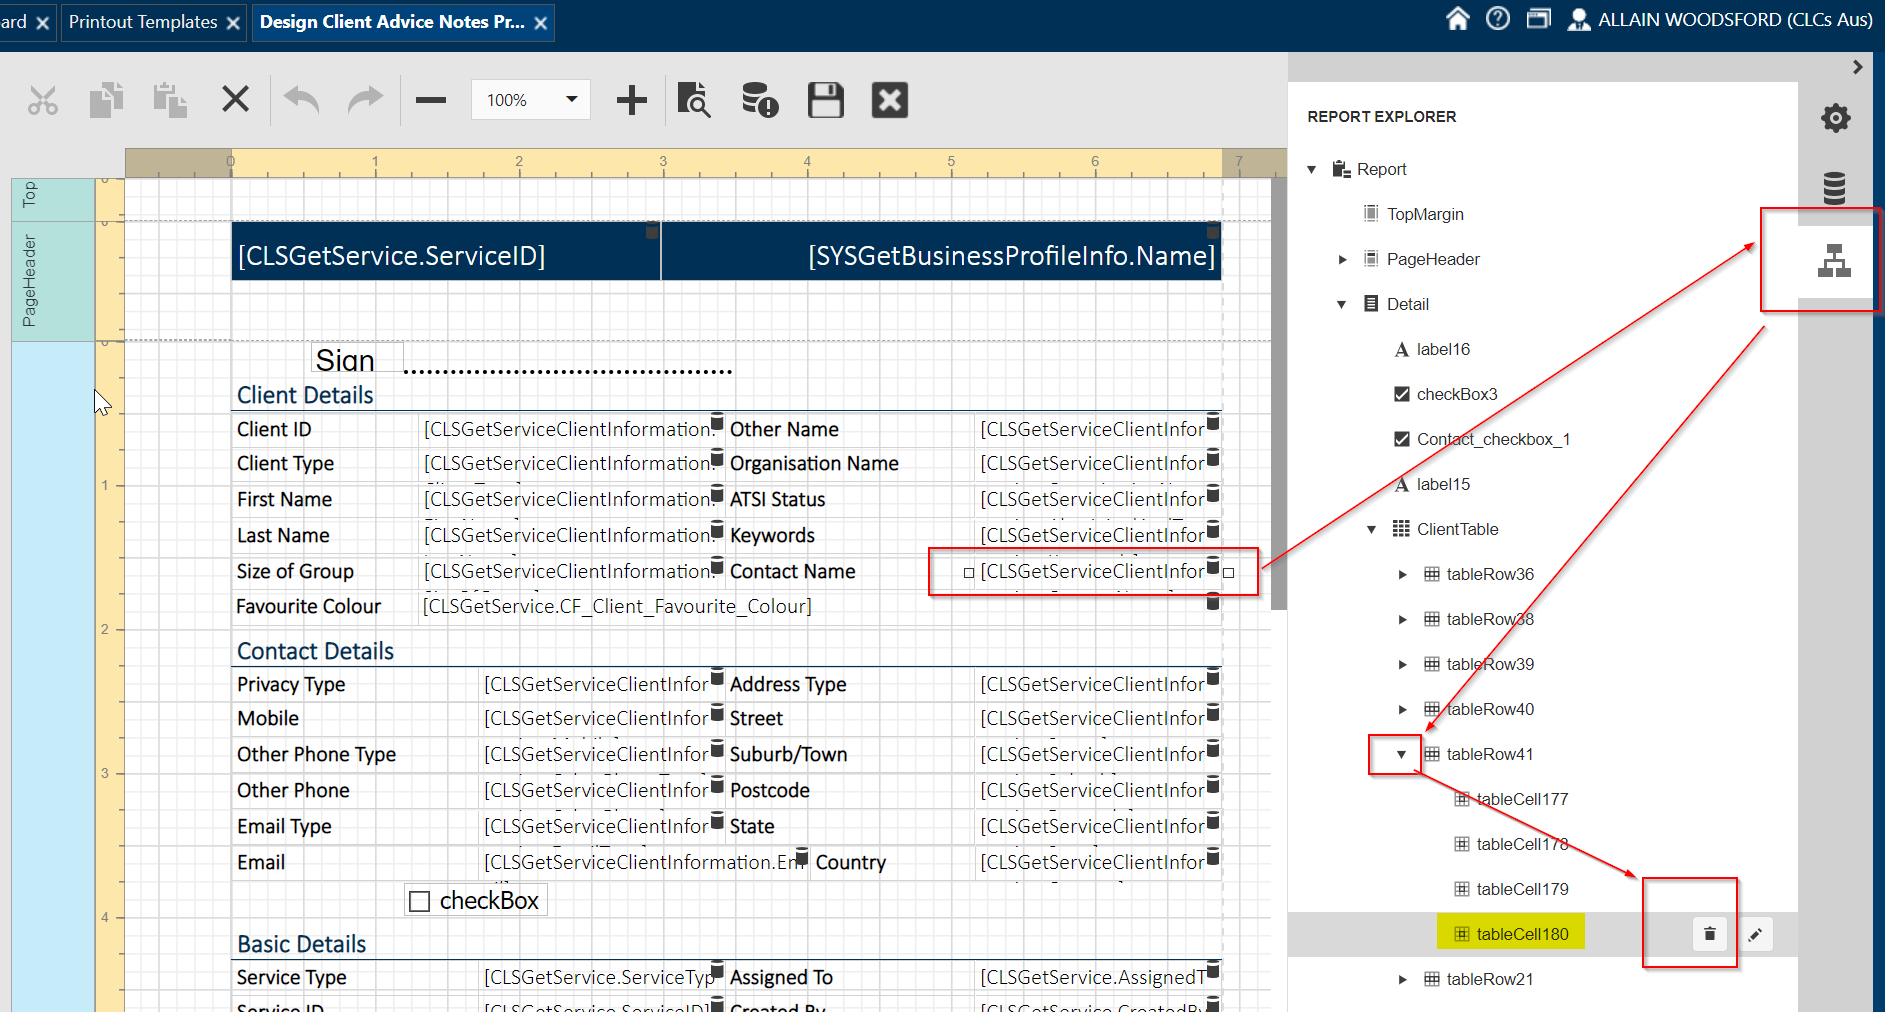
To delete a field within a printout template in particular the default one’s that sit in the Table / Cell format you have 3 ways of doing this. 

Just remember you can undo these changes with the back arrow icon just to the left of the Zoom in / Zoom out controls covered in the basics here 

Method 1:

  • Lets begin with you scrolling to the field you want to remove and left clicking it.
  • Once it is selected indicated by the white outline and or bounding box the delete button is toward the top left see the screen grab below, please left click that ‘X’ icon and it will now be deleted.

Method 2:

  • From the Report explorer control on the right hand side 
  • Look for the item in the hierarchy drilling down the parent elements till you can see it (Or left clicking it in the centre of the document like Method one)
  • Press the Trash / Bin Icon and it will now be removed

Method 3:

  • The Third method is only relevant for Table / Cell layouts which are exactly what default templates are mostly constructed with. 
  • Left click on the item you want to delete and note that you can delete an entire row if you would like with this method
  • Go to the properties of the item via the cogwheel to the far right 
  • Now click on the Delete Cell action button or the Delete Row action button if applicable.

Adding & Modifying a Field:

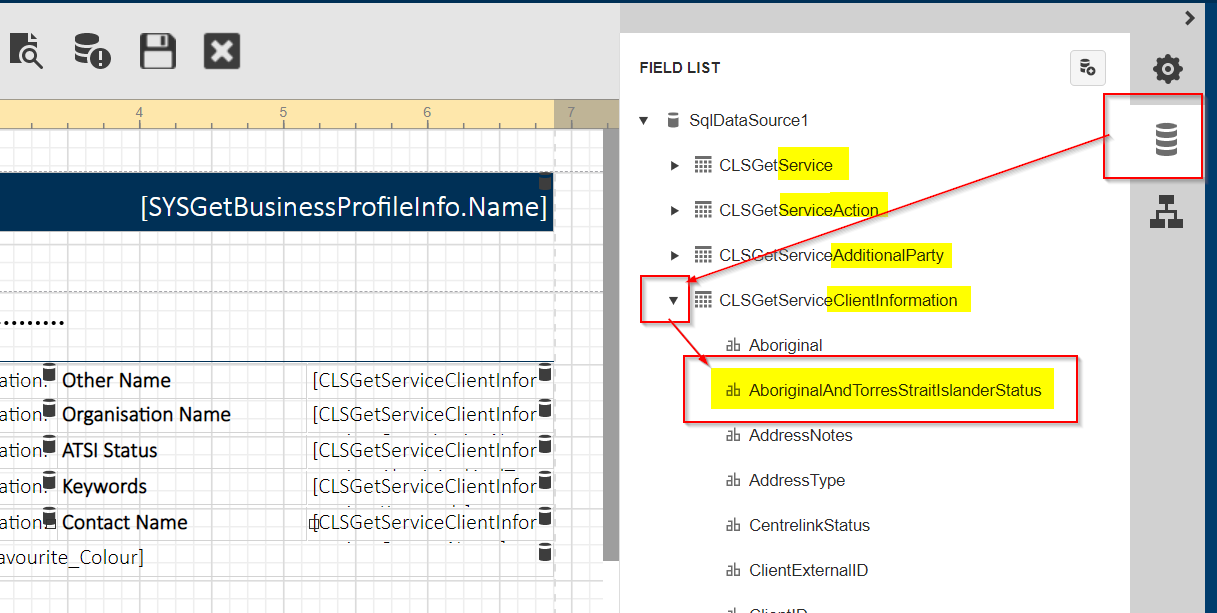
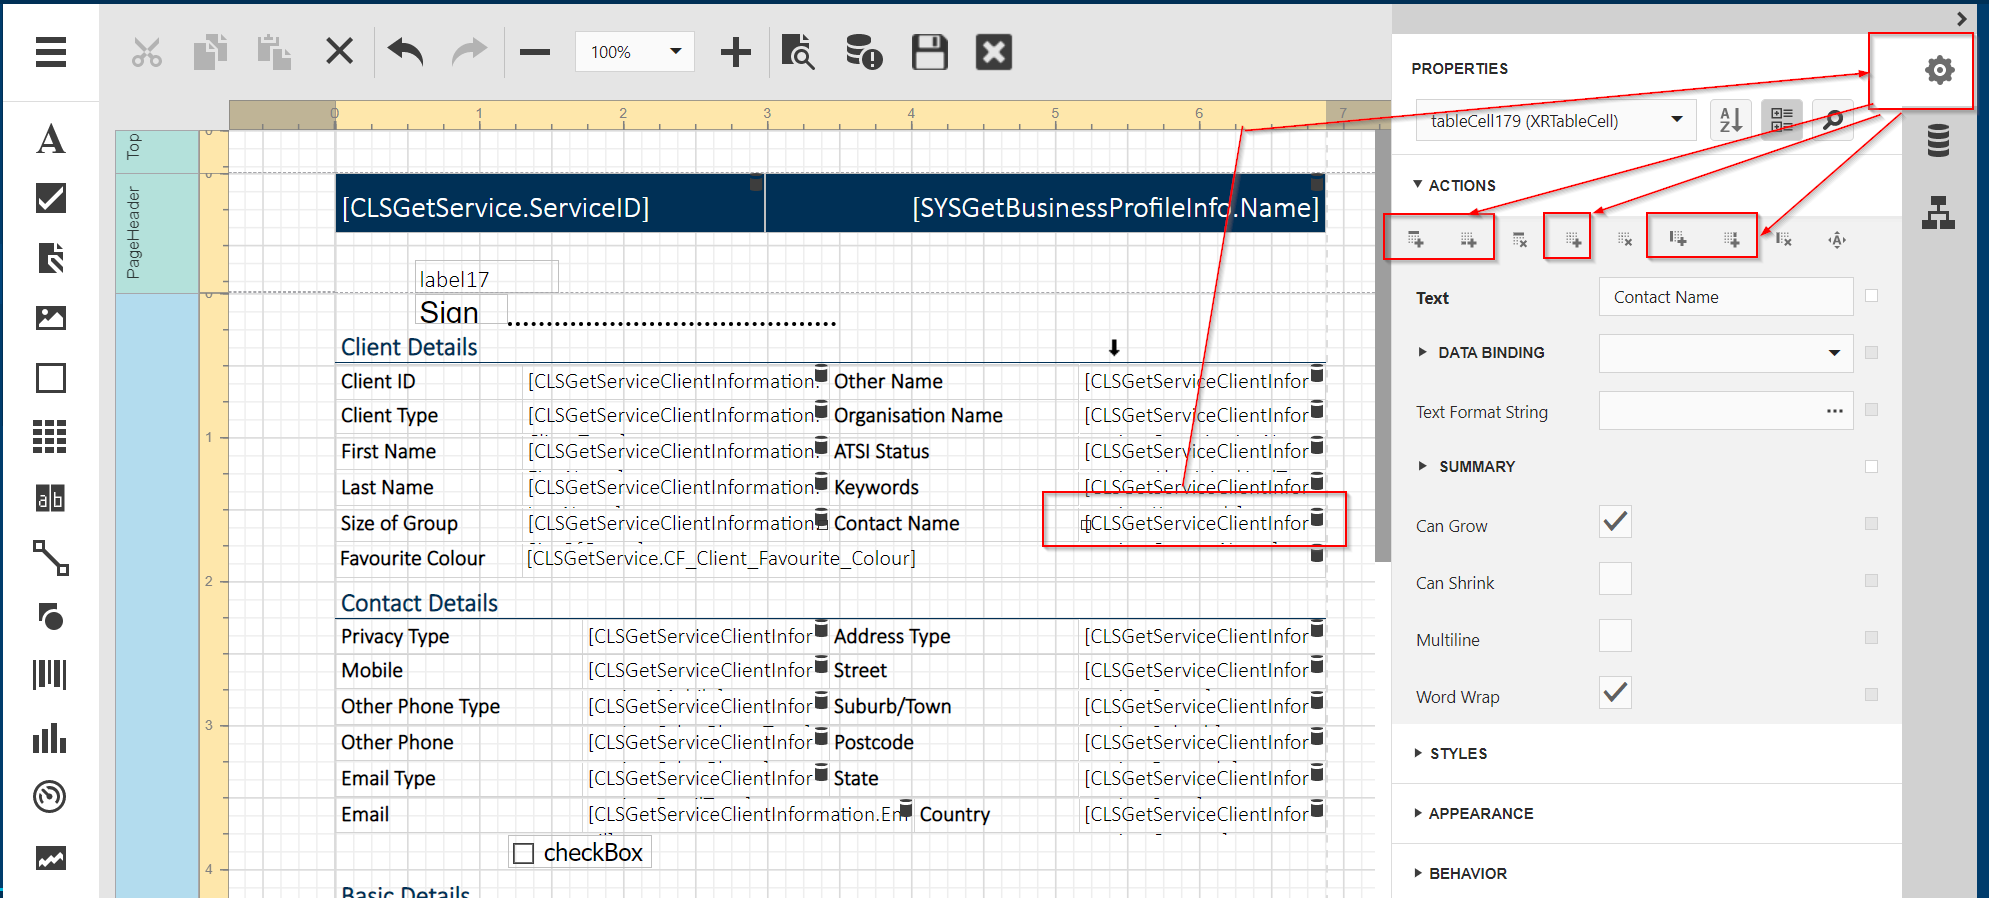
Remember to first locate which field you want to add based on the Field List on the right hand side as these fields will be contained under certain tables or parts of CLASS where the fields normally sit such as the ATSI status below is within the Client Details table, note that you should only read the ends of these Table names to not get confused.

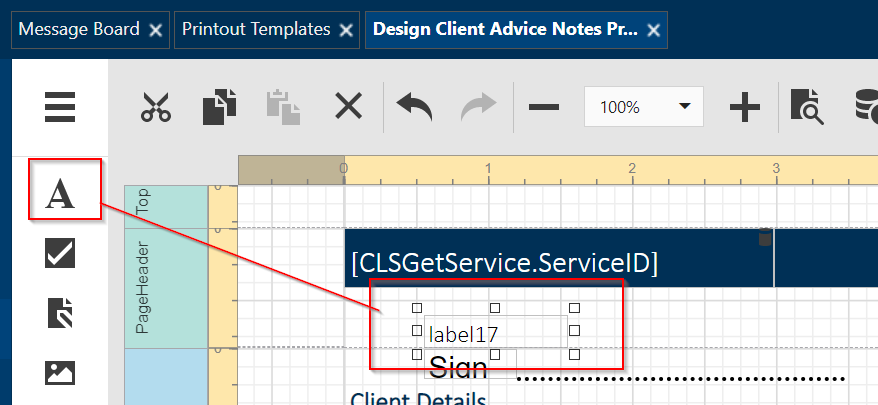
Now that you have mentally where the field is located in the Data Source structure you need a place to put it. Either Add a new field by first dragging in for example a label from the left hand side of the Editor

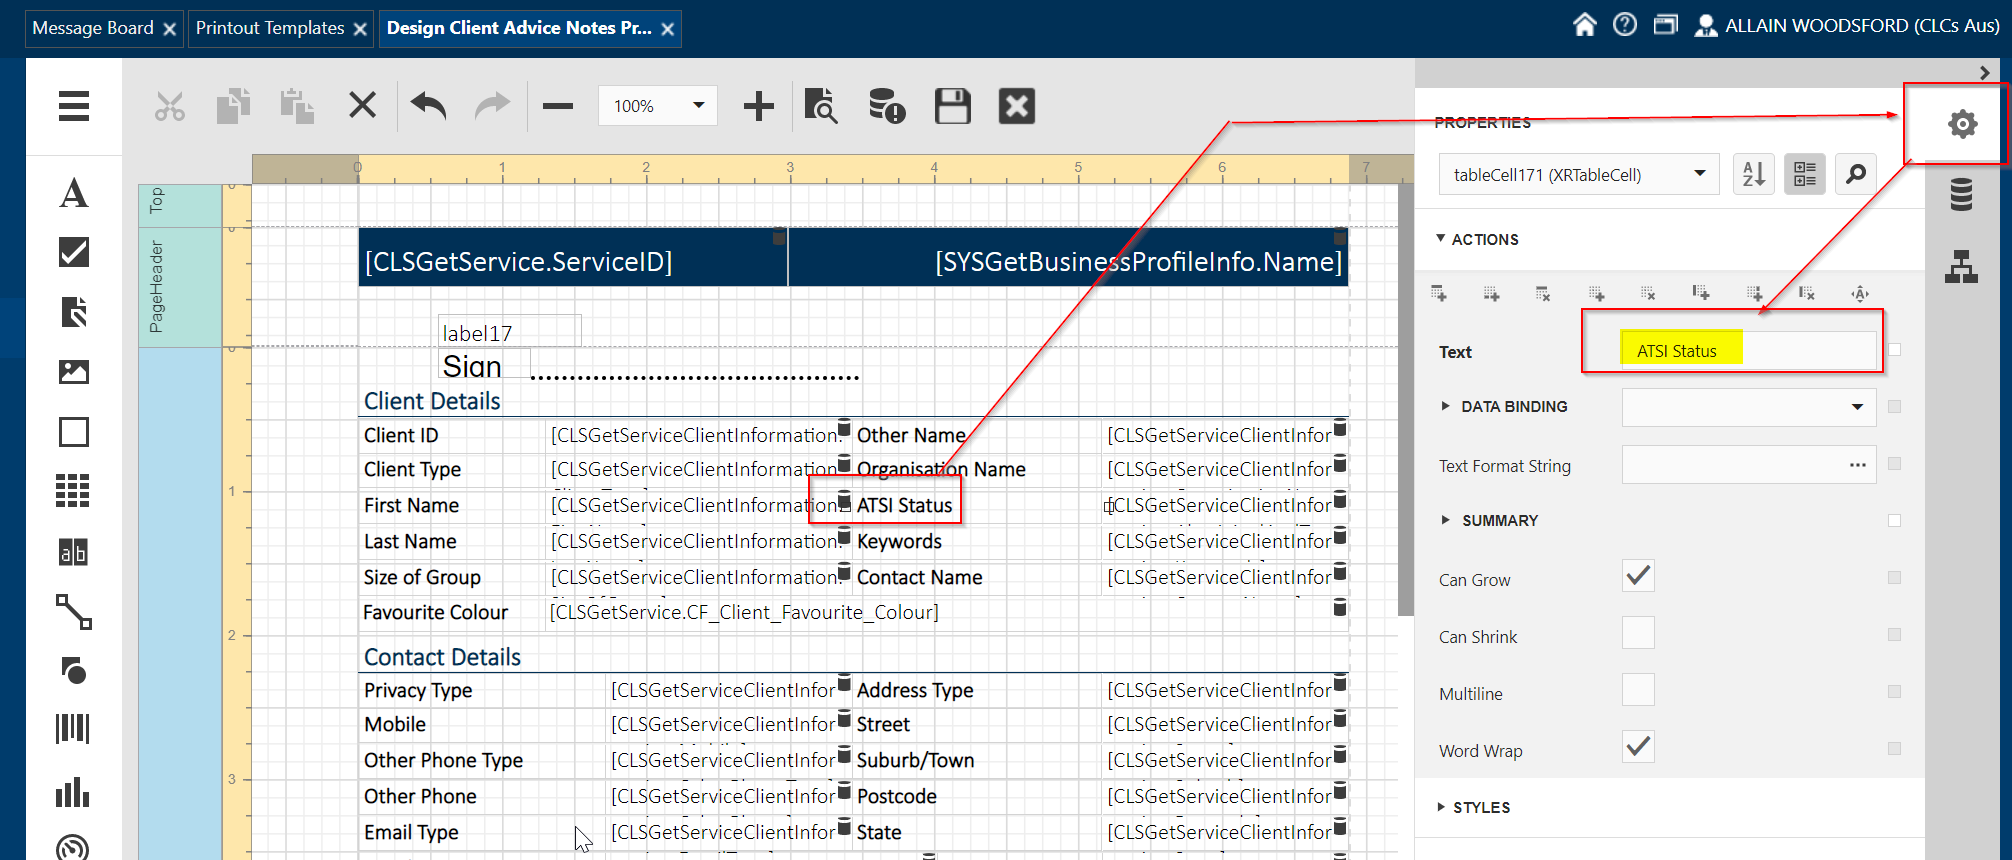
Or left clicking on an existing label within a Table and using the Action Buttons under the Properties (cogwheel toward the top right) with “+” signs next to them these will let you:

  • Insert new rows (above and below)
  • Add new Cells (toward the right)
  • Add new columns  (left and right)

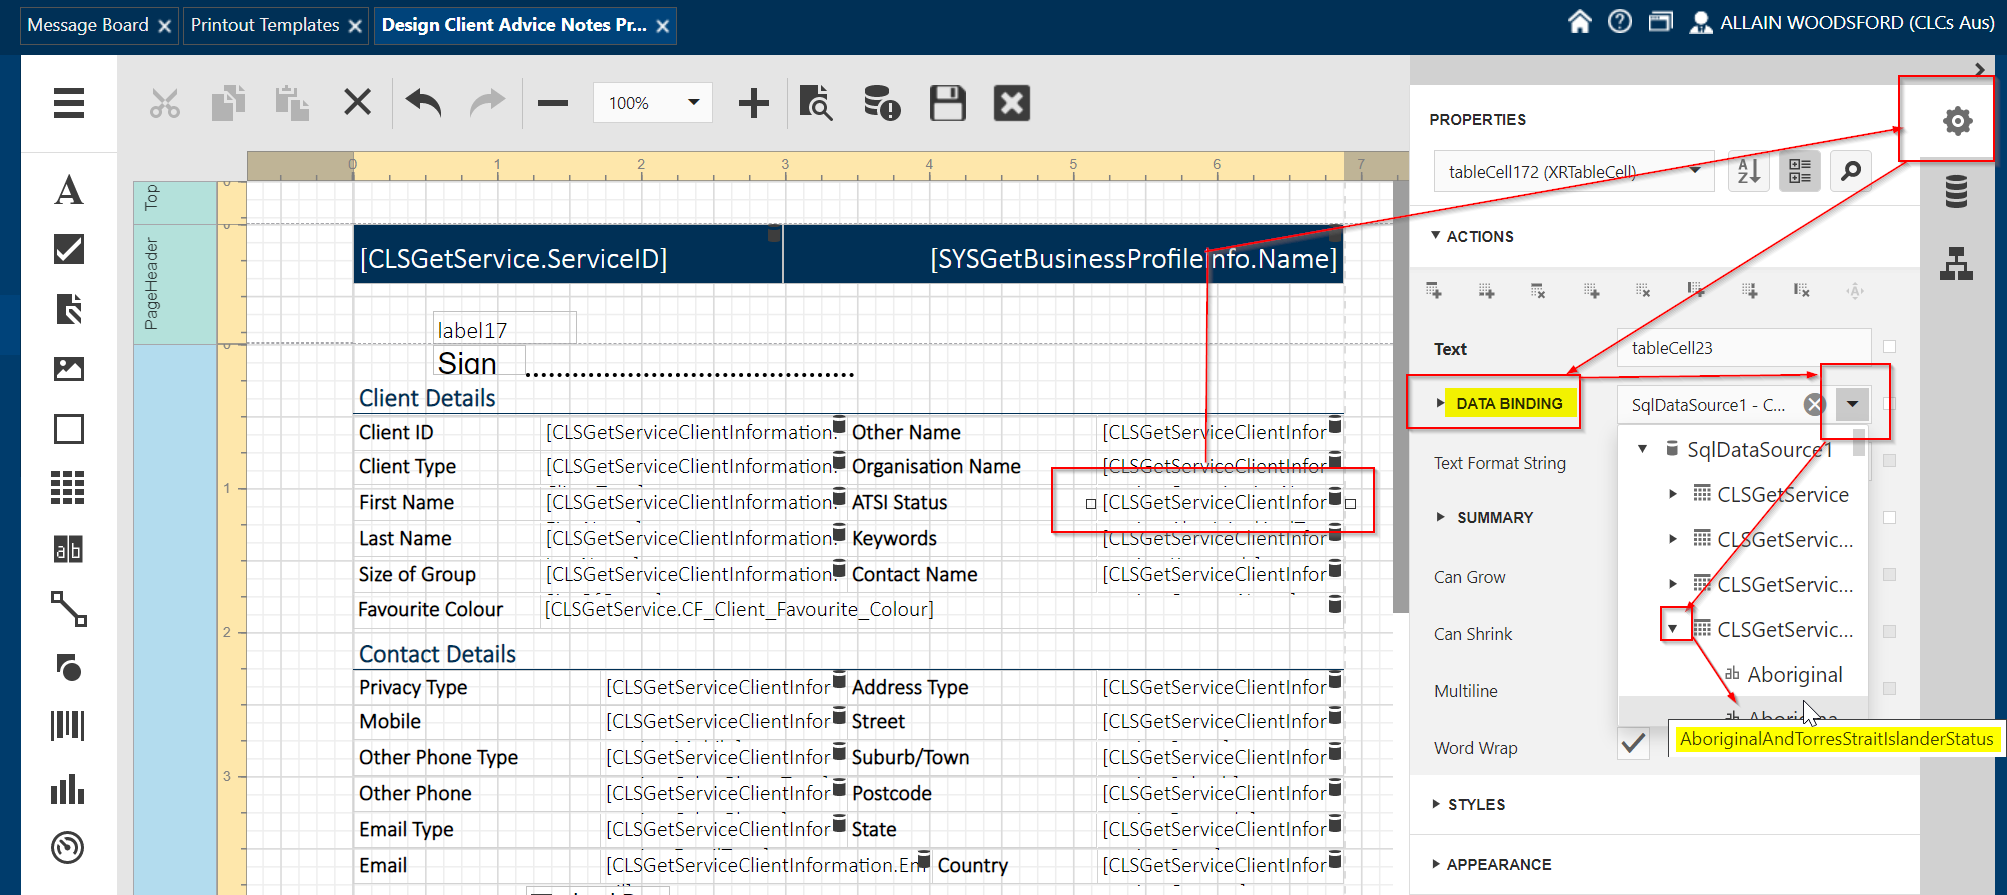
Or Left clicking an existing field you would like to change such as an existing label with the black database icon on the right end of it and now going into the properties of said label, this also goes for any items you have added using the above methods. Follow these steps:

  1. Left click on the item
  2. On the right hand side pick the Properties or cogwheel icon
  3. Under the Text set of properties locate the “DATA BINDING” property
    1. ‘x’ off an existing property if any are present
    2. press the down arrow at the end of the field it is a Drop down control
    3. Search for you field under the relevant table (hover your mouse over each table as the names get cut off or memorize the order of your needed table) 
    4. Expand said table via the “>” arrow to the left of the table name
    5. Left click and or scroll through and left click on the field you need
  4. You have added or updated the label element to get the field you want
  5. Remember to update the Plain Text label that would normally sit next to this under the text field. 

Video to delete, modify and add Standard Field:

Search