The Centre Profile Menu allows you enter or edit your centre’s general details, such as centre logo, address, ABN, telephone number and also your centre email server settings.
To add your centre’s logo or photo, just click in the image window. Choose upload and select your image. Enter further details as appropriate. Your addresses are available in the drop down menu. (see: Image 1)
Image 1

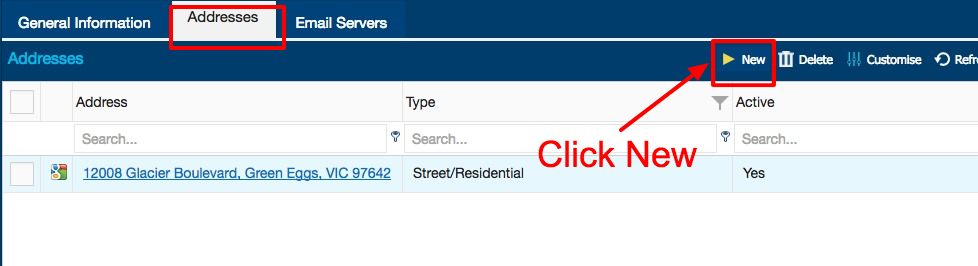
Addresses are managed in Addresses tab. In order to enter or edit you addresses, select the underlined address to edit or new to enter an address.
Image 2
If new is selected, the following window appears. Selecting the drop down menu allowing to select the address type (Postal, Street etc). You can have multiple addresses saved in CLASS for multiple location and even deactivate them. Deactivated addresses are still retained in CLASS but not available to use until they are reactivated. (see: Image 3)
Image 3

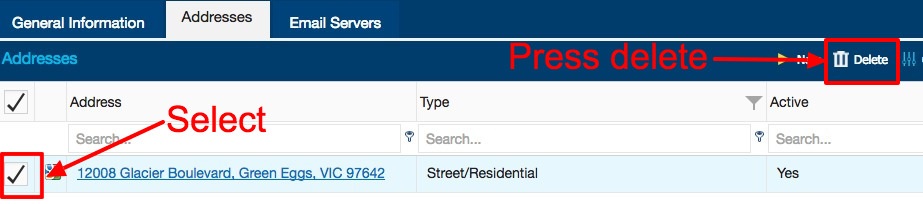
Should you want to permanently delete the address entry, select the address tick box and press delete. (see: Image 4)
Image 4
The Email Servers tab is used to manage the email server settings for the centre. The settings saved here are used for sending things like password resets, reminder and calendar emails to workers as well as mass emails. If there are multiple server entries the admins can specify which email server to use per email template. Whenever you try to save a new entry or edit and existing entry the application will attempt to authenticate with the email server. If it fails the settings will not save. Test Email will attempt to send using the input settings to the Sender Email Address (see: Image 5).
Image 5

Protocol: Which type of email protocol to authenticate and send with. By default POP, IMAPI, HTTP is the most widely used
Name: The name shown on the list view and when selecting the email server in the email templates section
Sender Option: Send email using user detail (sends email with the details shown as the application user) or Send email using server detail (sends email with the email server details). The default procedure should be to use the ‘Send email using server detail’
Sender Name: This is the name shown on the email.
Sender Email Address: Email address shown in the email as the sender
Reply to Email Address: The email address that replies will be sent to when the recipient tries to do a reply.
Send Copy to Email Address: Any email sent from the system can be sent a BCC to this field
Authentication Type: Determines which fields are shown for authentication. Default is set to ‘Use common server authentication’
User Name: Username of the email account used for authenticating the system to send the emails
Password: Password of the email account used for authenticating the system to send the emails. (performing any changes to an entry will require the password to be re-entered.
SMTP Server: Server address of the SMTP server
SMTP Port: Open listening port for authenticating the CLASS application with the email server.
Use SSL(SMTP): Option to use SSL protocol
POP Server: Server address for POP protocol mail
POP Port: Open listening port for authenticating the CLASS application with the email server.
Use SSL(POP): Option to use SSL protocol
Default: When checked, if a field requires the email server to be selected, this entry will be the default.
The email template will also need to be modified or the settings will not save. To do this, go to; ‘Tools’, ‘Email Templates’. Select your email template and change the sender profile to your new email server.