DIY Recipe 4: Worker Caseload – Open Representation Services

Purpose

The purpose of this report is for the centre to get a quick snapshot of open representation services currently assigned to each worker.

Step-by-step guide

Initial setup

  1. Open DIY Service Client in reports.
  2. Select ‘Save As’, name your report something descriptive, tick save changes if you want (applies to new report – and you can toggle later).
  3. The saved-as and newly named report should open in a new CLASS tab. From here on we are using this new DIY report.


Field placement and filters

  1. Right click near the top and select ‘Show field list’. You can expand the box to make it easier to see.
  2. One at a time, select the following fields and drag and drop them into the ‘Drop row fields here’ section of the DIY report in the following order (note you can ctrl+f/ cmd+f to search the page):
    1. Assigned to, Service ID, Open Date, Close Date, Service Type, First Name, Last Name (feel free to change these at this point if you know what you want). Look to the screenshots later for a better picture of where we are placing them.
  3. Select the following field and drag and drop into the ‘Drop data fields here’ section of the DIY report:
    1. No of service.
  4. Set the ‘additional reporting dates’ dropdown on the left hand side to ‘Service Open Date‘ – this is necessary to show currently open but not closed services.
  5. Set funding categories to all, leave include custom fields and show all dates unchecked.
  6. Set a small initial date range, and load the report. There are a few more steps.
  7. Left click on the filter button for ‘service type’ and set it to only show the services you want – in this case representation services i.e. Other representation, Court/tribunal, Facilitated resolution process.
  8. Increase the date range of the report to enough to include all currently open representation services. Maybe use the ‘Last 12 months to date’ option in rolling date range dropdown unless you are sure about when your oldest open representation service open date is.
  9. Load the report again.
  10. SAVE THE REPORT – best to do this even if you previously ticked ‘save changes’, just to make sure.
  11. This should only be available in reports to the creator. Use the ‘Sharing’ button to allow different levels of access to this report on a role/ user basis. More info on this in ‘DIY Basics and Tips’ page.
  12. NOTE if you don’t want to see closed representation services in this report, either 1) note them as closed in the service status field and either ignore them or filter them out in this report using the service status filter, 2) use the ‘close date’ field as a row in the report, and either ignore the ones with close dates or filter them out using the filter (to only show ‘blanks’ i.e. services with no close date, essentially) or 3) do option 2 but place the close date field with filter set to only show blanks in the filter fields area. This way it won’t appear in the report as a column, saving some space.

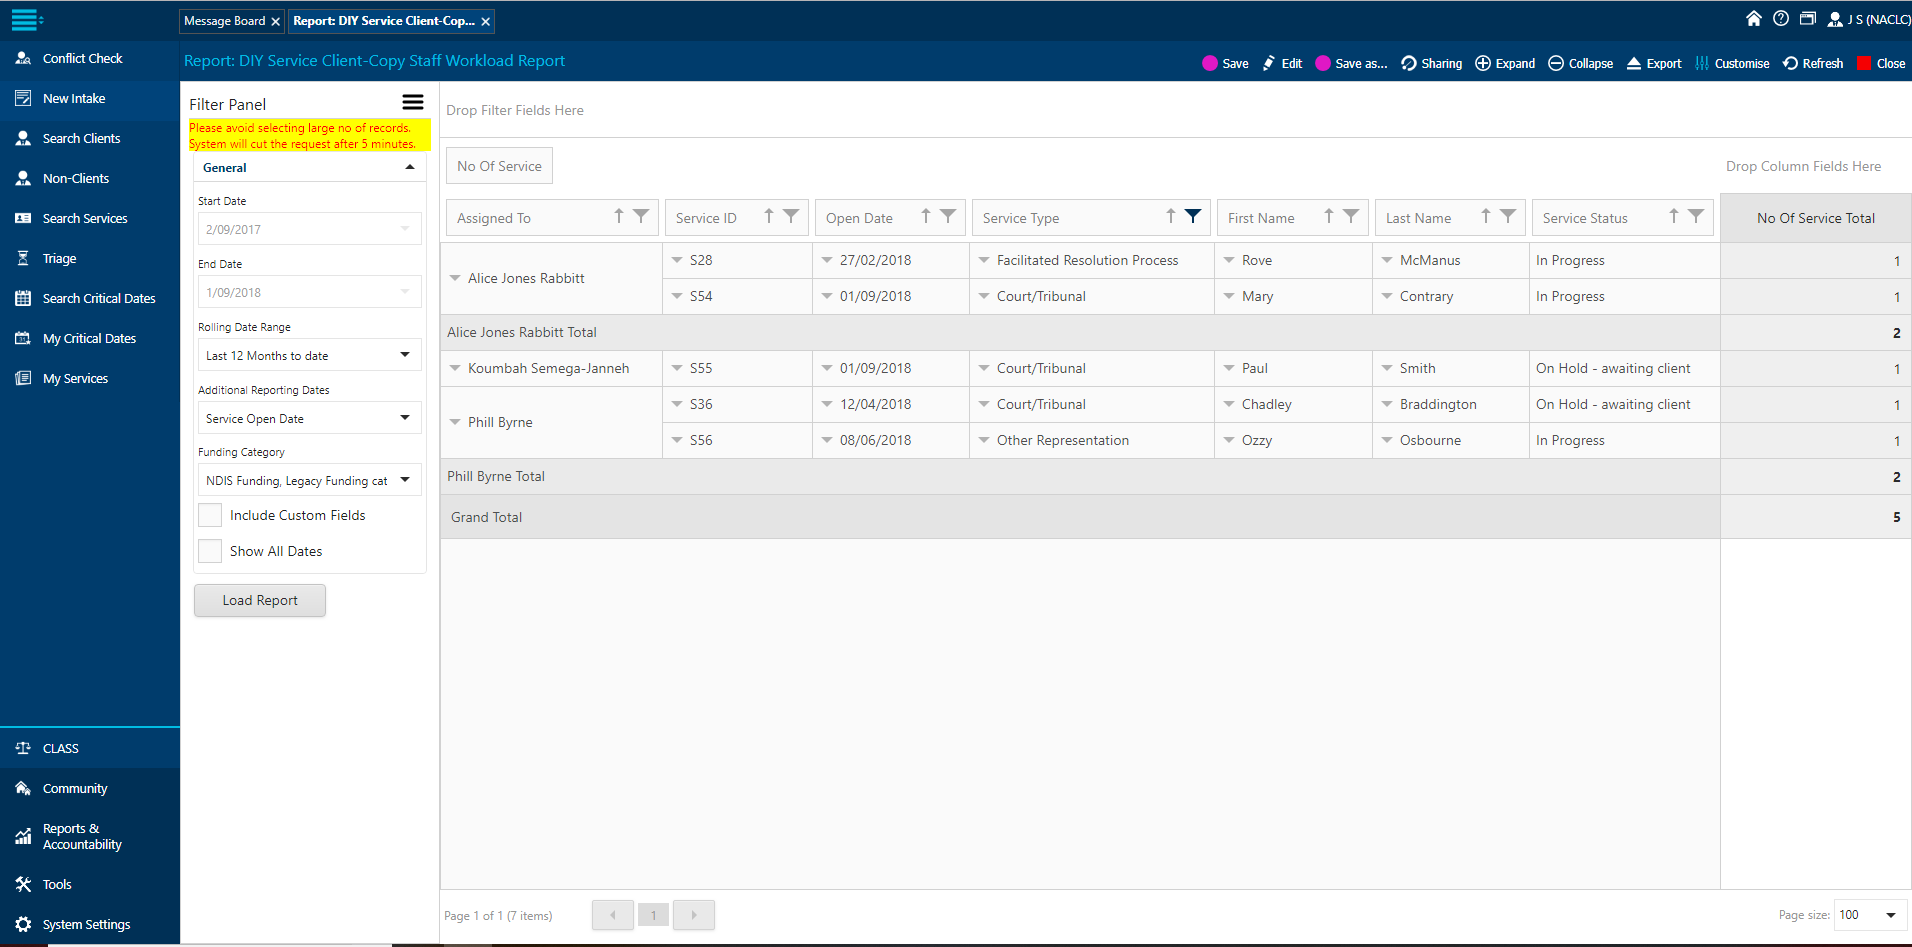
Below is an example using fake clients/ data and further options you might want to use.

Example report

Note that in the example shot we are also using ‘Service Status’ field to get a picture of what is happening with the service. Note that unless your centre uses this field, the results for the column will be blank. You can also use the ‘close date’ field to see closed services and filter them out as needed.

Further options

You can interchange any of the row fields – i.e. you might want more or less client info displayed, including priority fields such as Aboriginal and Torres Strait Islander status, homelessness status, family violence, age group etc.

The reason you don’t initially want ‘legal advices’ and other discrete services in this type of report is because every one ever assigned to a worker will appear. Using ‘service status’ to indicate ‘open’ discrete advices then filtering to show only ‘open’ discrete services.

If you just want to see results for some workers, use the filter button on ‘assigned to’.

If you want a customised report for individual workers, where they won’t have to filter to just their services or scroll through a list of other workers, you can do this when setting up the report by filtering to only show the specific worker, and then sharing the report with only that worker. You would need a separate report for each individual you want this style of report for. ‘Save – As’ your reports as you go and change the assigned to filter is a quick way to do this. However the main guide above to create a shared caseload list is much faster and contains more information.

Search