Consider these things when creating a custom field
What data needs to be recorded and why. Is a data field the best way to collect this data? Is the field for reporting purposes or Key Performance Indicators? If so think of the best way to measure, your desired output and the easiest way to record.
What is the granularity of the data you are trying to capture? Should the value you are capturing be associated and visible with the Client, Service or Problem Type(Data entities)? Attributes associated with Clients for instance are properties that don’t change over time/service of the Client, for instance Date of Birth is associated with the Client.
Is this data already available within our standard fields in CLASS and or our existing custom fields to avoid data duplication and double entry
Remember adding a new data field comes with some overhead. Users need to know it exists and why. To fill it in correctly they need to be aware of and understand its definition and purpose. It needs to be maintained in the future. (https://clcs.org.au/index.php/class-uatdemo-portal)
Ensure the title of the field is descriptive but also concise
Create definitions (if not obvious) for the different values available in the field.
Ensure a consistent naming convention for fields if they are related to a group for instance or if they are related to a short term project
Choose how the user interacts with the field (type) for example a Comment box or Single input.
Choose the correct field type for what you are trying to capture:
Number – Used so values can be added quantitively
Text – Defined Categories can be used to quantify responses (avoid free text)
Date – Used for any kind of date stamp, measurement of day, month, year
Time – Used for any kind of time stamp, measures time
Email – some validation performed that is valid email.
Avoid Plain free Text boxes where possible. To improve data quality choose defined text options for your users and create definitions for them if necessary.
Plan for edge cases to avoid issues with the process especially during launch or usage i.e. if you planned to release several Custom Fields. In this case a multi-line paragraph text box can be useful however use it sparingly.
Consider where the field should sit on the interface itself. Should it go under an existing grouping such as Service details or on its own Group (more on this later)
Consider whether your custom field needs to appear on the Client record or the service record. Do note that when creating custom fields for services you can cause these to appear based on the problem type (or service type) of the service so that is more specific as with custom fields on a client these can only be mapped to a narrower scope.
To begin customizing remember the “Customize” button via the top right > Custom Fields Tab > New Button or Navigate to an existing field by turning the pages.

Consider when it is appropriate to make a field Mandatory if these are reporting KPI specific and it’s a custom field its likely that making it Mandatory would be a good thing. This is done by selecting “Required For” after opening the custom field. On the other hand having too many Mandatory fields increases the time per record and may reduce data quality and stats due to user frustration.

You can enable Custom Fields to be filtered on in views such as Search Services and Search Clients. This is via the “Show in list view” tick box.
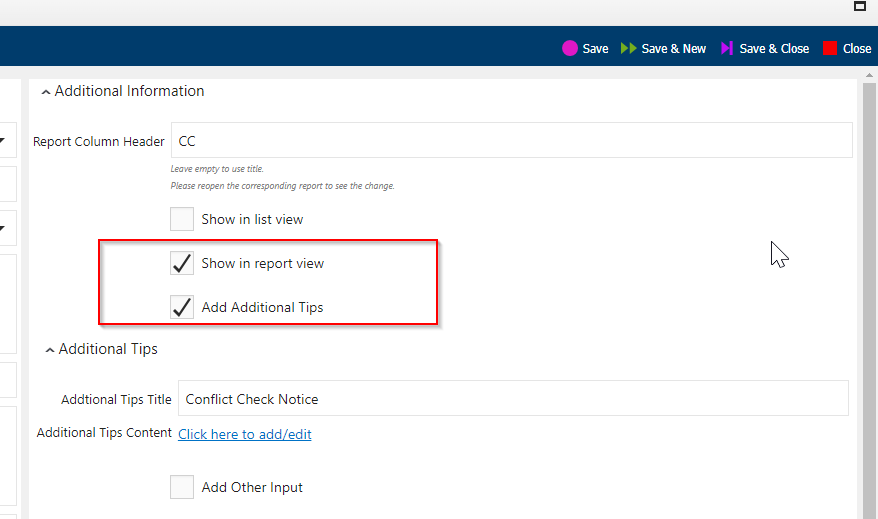
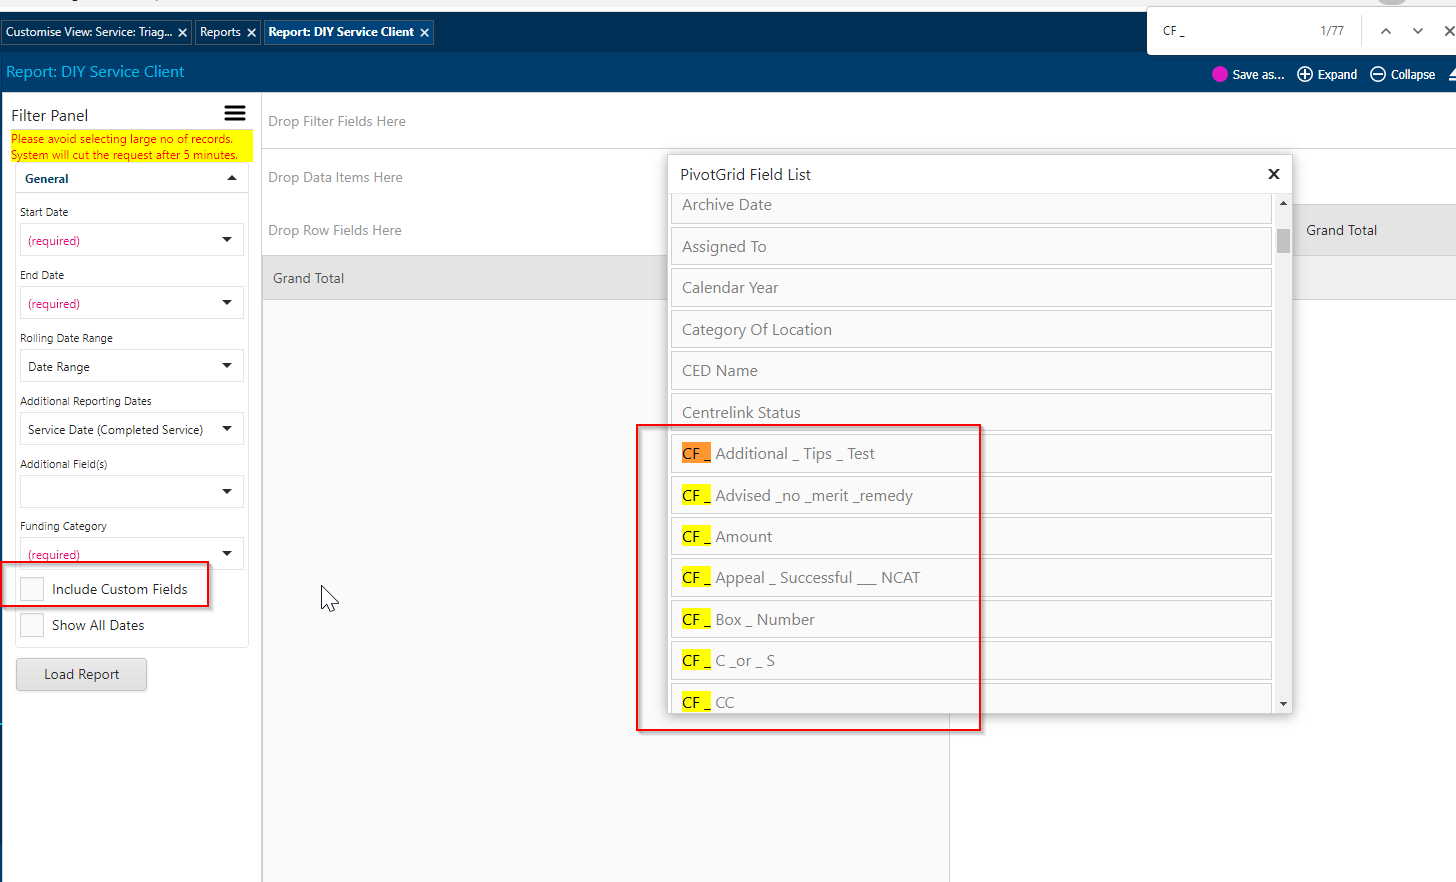
Similar to the above point the “Show in Report View” enables custom fields to be searched for and dragged and dropped into DIY Reports this is turned on by default when you first create a Custom Field.
Just note that custom fields are normally prefixed with “CF _” and will not present data unless the “Include Custom Fields” tick box is checked on the left hand side just above the load report button.
On a service record for example rather than the custom fields appearing at the bottom of the Characteristics section and or the basic details section it may be more beneficial to “Group” them in there own section with a Label. Some Examples Centre’s have used this to centralize on a record:
To Group fields you need to:
First create a new group via that familiar customize button on the top right of an open service or client record.
After pressing the button and going to the “Custom Fields Tab” instead of pressing New via the top right again highlight it (mouse over) and select “New Group”. All you will need to enter is a name and save i.e. “Service Check”

Now any existing fields or new fields can be put under that grouping by first opening the custom field and updating the group field
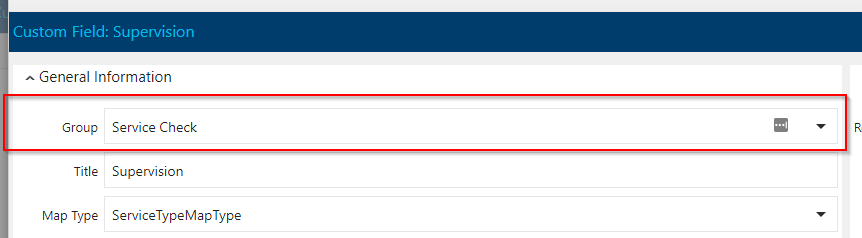
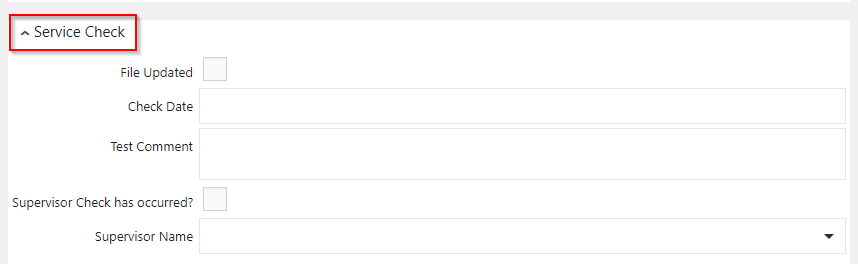
An example Grouped set of Custom Fields below:
Where appropriate you have the ability to shorten and or abbreviate a custom field’s title on a DIY Report view so the Column Title does not take up too much space. We don’t suggest you use abbreviations unless its extremely common knowledge at your centre but just to shorten the name if you want DIY reports with allot of custom fields to be displayed in a more user friendly manner after you have pressed the “Load Report” button.

This is preferential but please remember a drop down can encapsulate more information and display in a more compact manner rather than having several columns of buttons, this will increase the usability of your services.
In particular for Multiple Choice (Only One Answer) the drop down should be the preferred display method.

If you are unsure where to record a demographic or if said field already exists in CLASS please contact our helpdesk icthelp@clcs.org.au and we can look into that for you. Please also review the Data Standards Manual and our Data Consistency Guide
This can cause issues with the risk of not being able to display prior data recorded especially if the data type has been changed reports will need to be run on a particular time period rather than broadly now to capture a modified field
Existing Custom DIY Reports with a changed custom field will now throw concurrency errors and may need to be updated
We suggest you avoid the insertion of Characters such as an Apostrophe ‘ or any other special characters: (!,$,%,^) as this can cause issues when exporting content out of CLASS and into other systems as well as within CLASS itself.
The Single Check box are better suited to opt-in type data that isn’t typically included in CLASS (like marketing emails tick box, client advised of file destruction policy etc). Having a Dropdown with options for i.e. Yes, No, Unkown, “N/A” can prove more useful from a reporting perspective as the Check box will show up as “Yes” for ticked and blank for the rest.
We suggest if a field or set of custom fields were used to record information and or a survey for example and are no longer used that you don’t delete them but instead hide them from the record itself by un-ticking active and removing all permissions under “Show For” and “Available for” by clicking the “x” next to each option then saving.
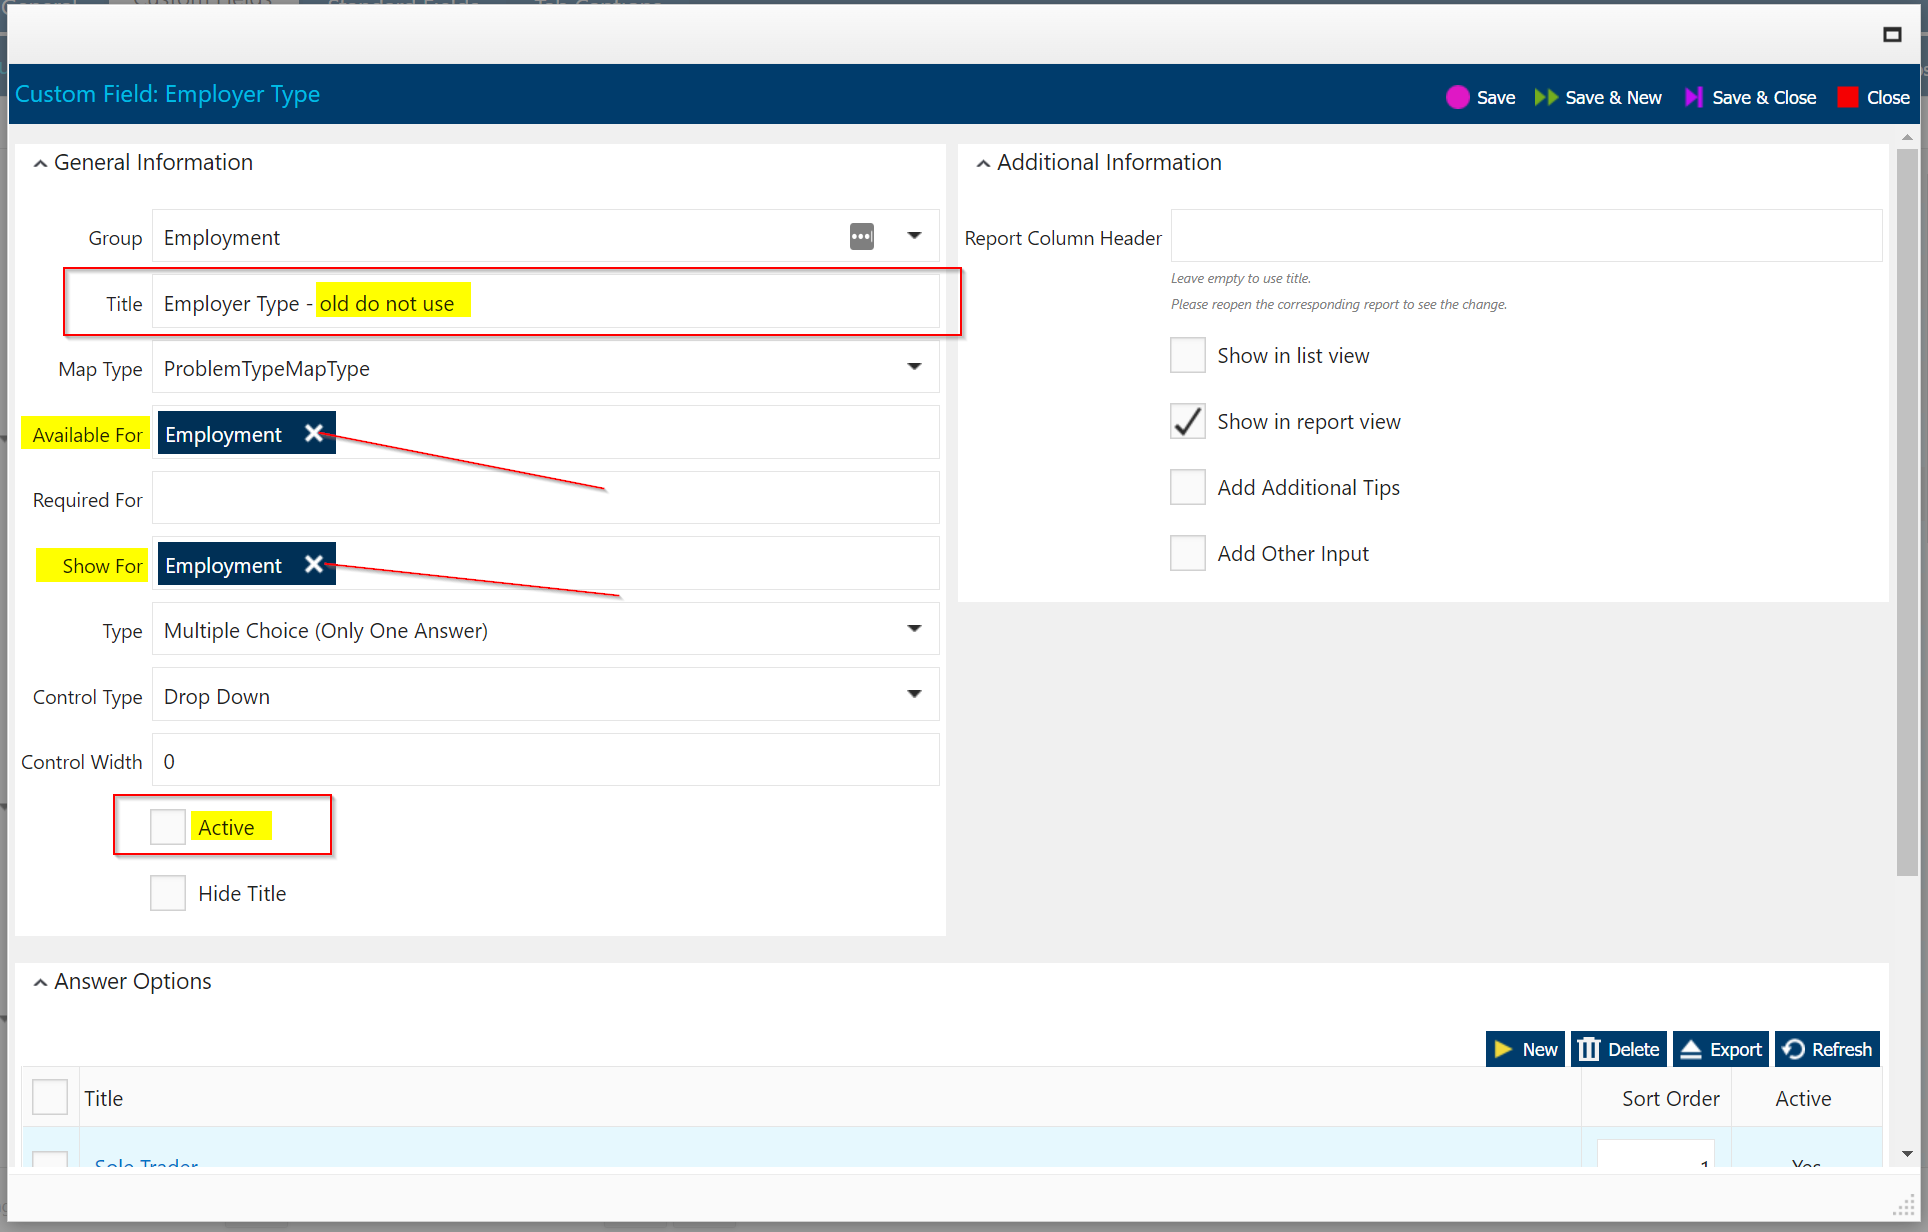
Part of this process may be appending something like “Old do not use” to the field name so future CLASS administrators at your centre are aware when looking at existing custom fields. Consider creating a Living document internally that keeps a catalogue of your custom fields and their historic usage as its better to be prepared or able to report on these if some need for doing so will arise in the future.