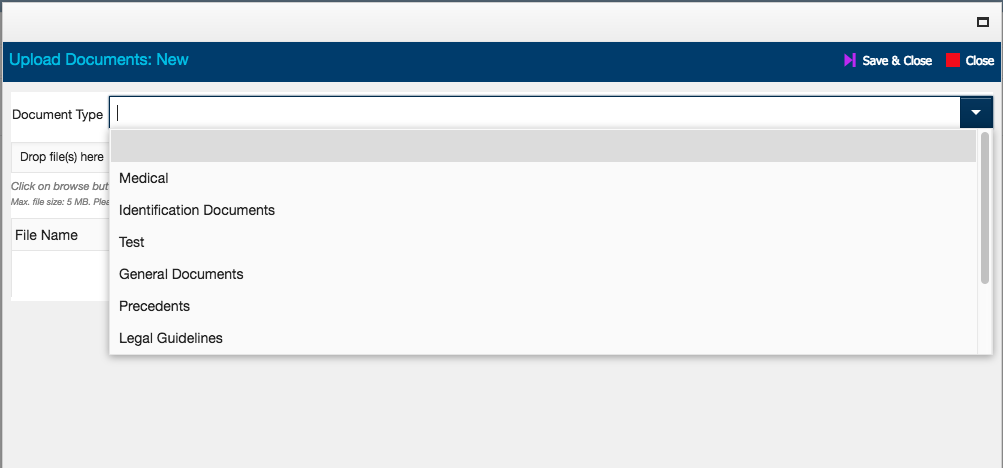
Uploading documents to CLASS

How to Upload Documents to a Client or Service

CLASS Users can now upload documents to a client’s details page or an individual service for a client.

On this page you will find step-by-step instructions to using document management, and a video guide.

On this page:

  1. Open your client’s detail page or service details and choose the documents tab.
  2. Select the New button – the ‘Upload Documents: New’ pop up box will appear.
  3. Select the Document Type in the drop down menu or if you are uploading multiple documents of different types, you can leave it blank.
  4. a) Click on Browse… and select the document/s you wish to upload. You can upload up to 5 documents per upload.
    b) OR Individual or multiple files can be dragged into the ‘Drop file(s) here’ field
  5. Your document/s will appear in list form.
  6. a) You can edit each file’s Title, Document Type and Description.
    b) To cancel uploading one or more documents click the red X next to the description field of a document.
  7. To upload your documents, click Save & Close. 
  8. Once uploaded, you can order your files by clicking on the column titles above their search fields i.e Title, Document Type, File Name etc.

TIP: Attach to a ‘Client’ or a ‘Service’?

Documents attached to a Client’s service will not be directly accessible from the documents tab on a client’s detail page. It is worth considering whether a document, perhaps ID documents etc, should be attached to a client’s permanent record or is only relevant to the client’s current legal problem.

Step 1. Open your client’s detail page or service details and choose the documents tab.

Step 2. Select the  button – the ‘Upload Documents: New’ pop up box will appear.

TIP: Adding Types

If you do not see a relevant document type your Centre’s Admin can customise/add new types of documents in Types and Categories under Document Type.

Step 3. Select the Document Type in the drop down menu or if you are uploading multiple documents of different types, you can also leave it blank.

TIP: Select Multiple Files

To select and upload multiple documents at once, hold down the Control if using a PC or Command button if using Mac and click on your selected files. Keep your finger on the button while selecting. Then drag or choose Open.

Step 4a. Click on Browse… and select the document/s you wish to upload. You can upload up to 5 documents per upload.

Step 4b. OR Individual or multiple files can be dragged into the ‘Drop file(s) here’ field.

Step 5. Your document/s will appear in list form.

TIP: Bulk Upload Type

If the bulk of an upload is mainly one document type, you may want to first choose the type in the main Document Type drop down, then change particular ones in each documents’ secondary Document Type field if needed. If you change the top Document Type after already selecting and choosing different types in your list, they will all be changed to the primary document choice.

Step 6a. You can edit each file’s Title, Document Type and Description.

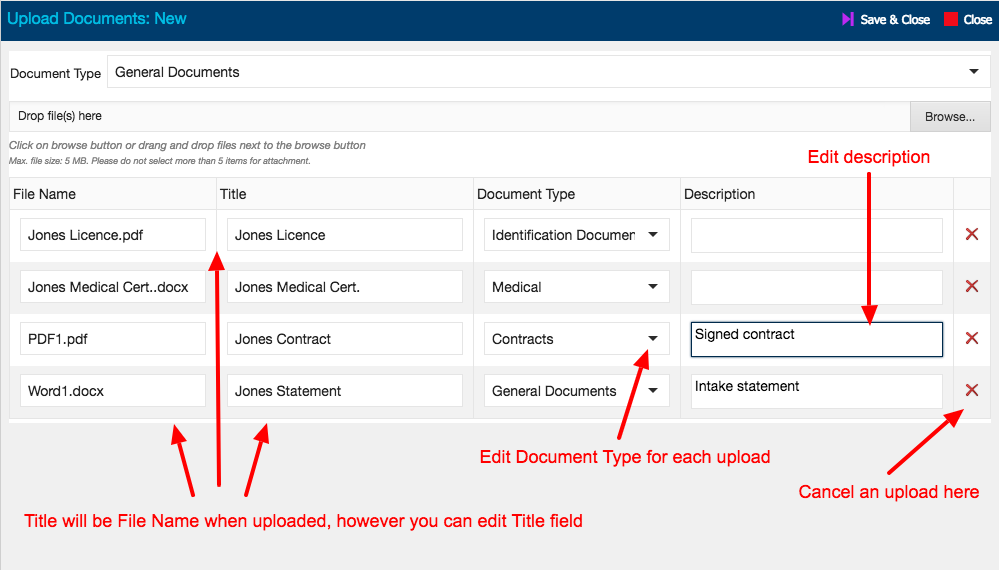
Step 6b. To cancel uploading one or more documents click the red X next to the description field of a document.

Step 7. To upload your documents, click Save & Close. 

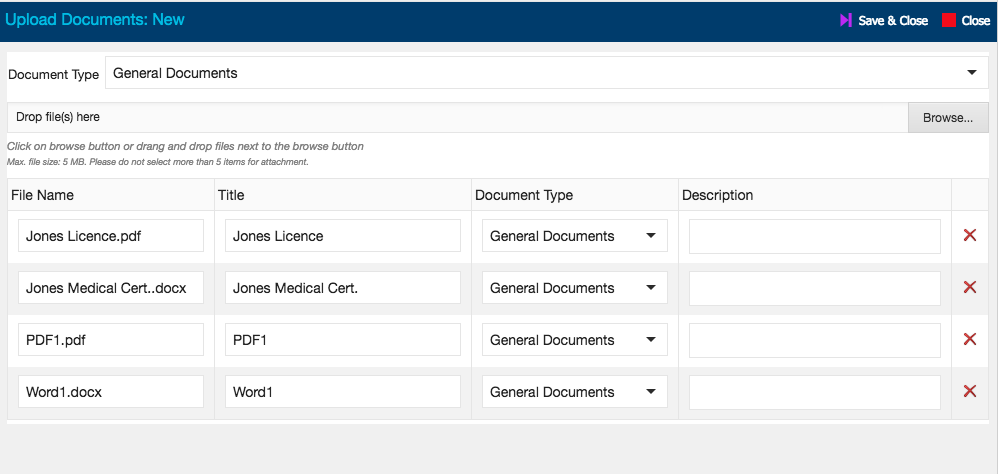
Step 8. Once uploaded, you can order your files by clicking on the column titles above their search fields i.e Title, Document Type, File Name etc.

Video guide to the new document management feature

Search