Mobile Phone Conflict Check App

CLASS under certain circumstances can be accessed remotely, meaning away from your office.

There are two types of Remote Access:

To learn more about Remote Access and how it works click here.

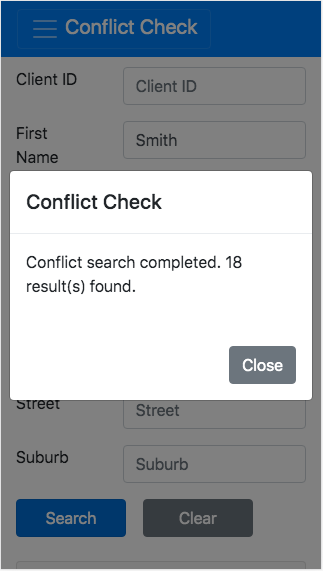
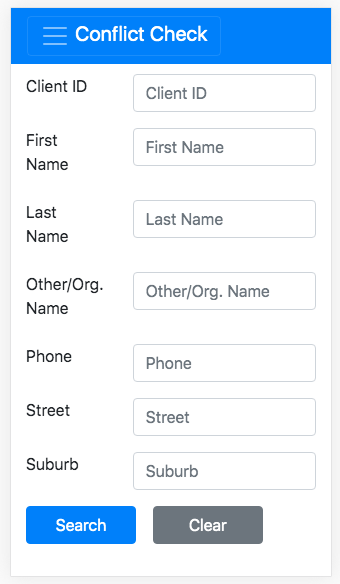
The Mobile Phone Conflict Check app uses Remote Access to provide a cut-down version of CLASS, designed in the small screen style of a phone App. Mobile Phone access provides fast but minimal functionality – it allows the user to run a basic Conflict check search (see screen shot). It is not designed to allow a user to enter new or edit existing data such as clients or services. Users will need office based or Large screen remote access to do this.  

Mobile Phone (or Small Screen) Access was designed for users that provide the majority of services using paper data forms, and have the need to run basic conflict checks away from the office. For example outreach or duty lawyers who need to quickly conflict check someone who is a “walk in” seeking an immediate service. This avoids reliance on calling through to the office to check every new person, and also means the lawyer or support worker does not need to carry a computer around with them, they can just run a basic conflict check from their phone. 

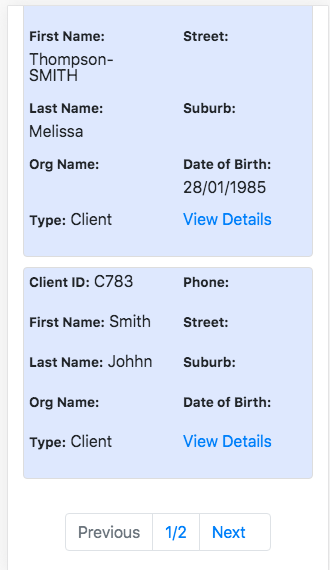
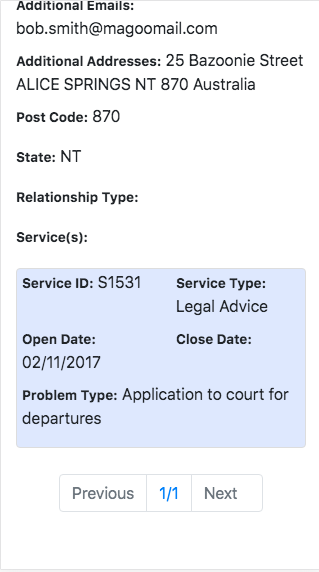
It should be noted that this is a basic conflict check, there may still be requirements to consider further detail such as calling into the office for a full search where a borderline scenario is found, such as where the potential client is listed as an Other Party to an old case, or something that is possibly so unrelated it may not trigger a conflict concern. 

In other words, the mobile phone conflict search is useful to ensure the potential client is does not have conflict, because they have no record at all, or are not listed as an other party. However it is not designed to so easily confirm if there is definitely a conflict. For that, further enquiries using office based or large screen CLASS access is recommended. 

For Mobile Phone Conflict Check app access to work users will need chrome browser on their phone, reliable internet, and VPN access set up on the device. 

How it works

After the user has set up VPN access on their device, to prove the VPN is working, using Google Chrome, (the only CLASS recommended Browser, available on all mainstream platforms), they should be able to access the login screen at the usual CLASS URL which is:

https://centre.classlaw.org.au

If this is working they will arrive at the login screen similar to the following screenshot:

If this login screen does not display, or the browser times out, this is most likely due to a failure of the VPN setup. Contact CLASS Helpdesk to assist. 

After entering active user account and password details, the user will arrive on the Mobile conflict check screen. This will operate the same as Above the Line Searching (Step 3 of Conflict Check searching) in the regular CLASS Conflict Check Search. 

Fill out the relevant details, In the following Example we will only input “Smith” into the Surname field, the rest we have left blank:

We then Clicked the blue “Search” button as shown above: 

In this case CLASS tells us there have been 18 results. 

To look at the results, the user click the grey “Close” button above, then scrolls down the page to view results.

In the image below we can see two of the 18 results, and as the user has scrolled to the bottom of the results there is a pager indicating that there are even more results than the first page – in this case there are 2 pages, click Next (or the number of page) to access other pages of results. 

Scrolling back up, we can see below some examples of results with all details (in contrast to the above examples that didnt have Address details etc.) Important fields to note below are;

“Type” – This indicates if the result is a Client or another party such as an Other Party, or Related Party. The examples below are both Clients.

“View Details” – This is the link that allows the user to view more detailed client information, and also a simplified overview of services (if any) attached to the client (or other type).  To see the Client Services click the blue link

But before we click View details to check on any services, we can scroll back to the top of results to locate the filters. This is how to access the equivalent of below the line filters (as explained at step 4 in conflict check searching). 

To access the options, click the “Additional Filter” button as displayed above. The result are the options. There are only four – Names, Phones, Emails, and Addresses, but these are actually quite powerful as they combine all elements into one place. E.g. Names will combine Last, first, middle, aliases etc into one place, and addresses will combine street names with suburbs and postcodes etc. So although simplified, they still work well for general searches. 

As indicted above, to clear a filter, click clear next to filter, to start from scratch and clear a search, click the clear next to the Search, shown above the filter box in the image above. 

So now to click an Example of the blue “View Details” link, found on the search results in the screenshots above. Here we see the following results in the screenshots below: 

Firstly we see the same as the overview, but importantly we can now see any Additional Names, additional (non primary) Phone numbers, Emails and the like.  

Then, at the very bottom of these client details there are listed any services attached to the client. There may be multiple services, accessed by the paging buttons. Each service has the ID, the service type, Open date (= date of service for Advices etc) and Close Date (if one) indicating how recent the service is. Problem types are also listed, but not further details such as actions or notes, or attached documents.  Services will still be attached if the person is listed as an other party, or related party to a service. 

To learn more about VPNs and how to set up access, please see VPN Set Up.

Search