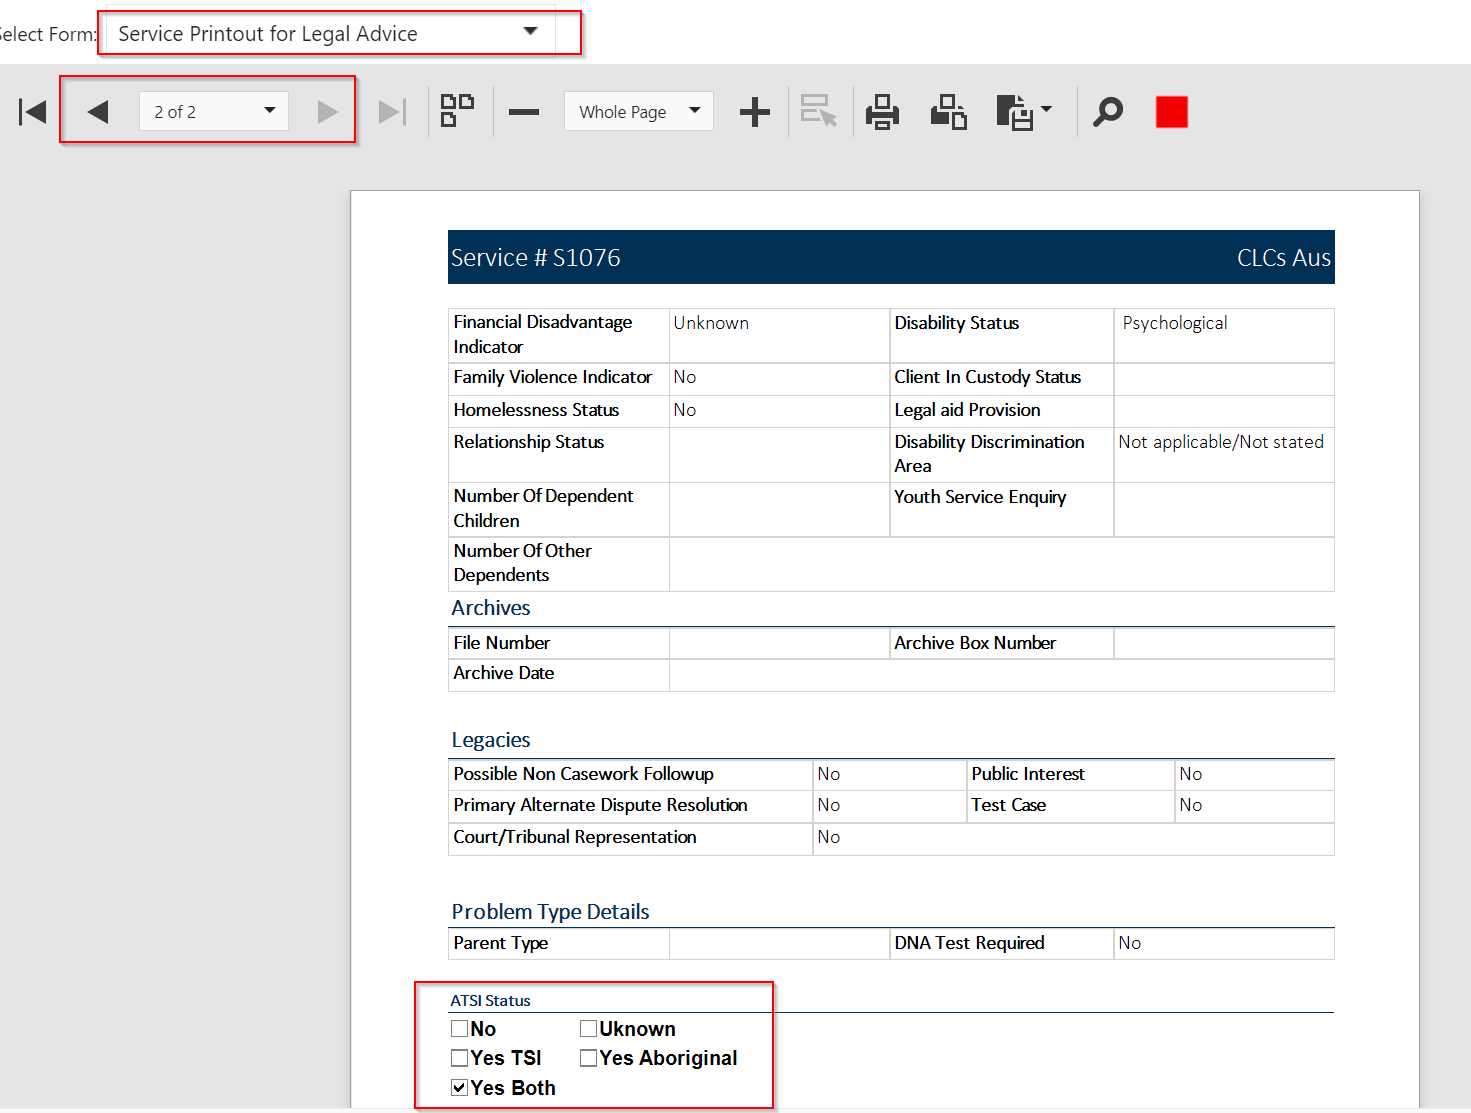
Some Centre’s have an interest in designing the Printout template data fields to display as a collection of check boxes that only one of them is ticked depending on what is actually selected in a CLASS record see an example of that below:
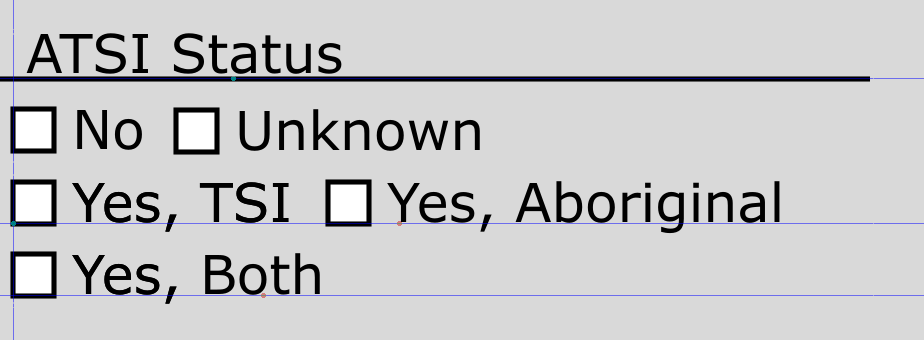
Just note the design itself is quite time consuming to produce so use it sparingly.
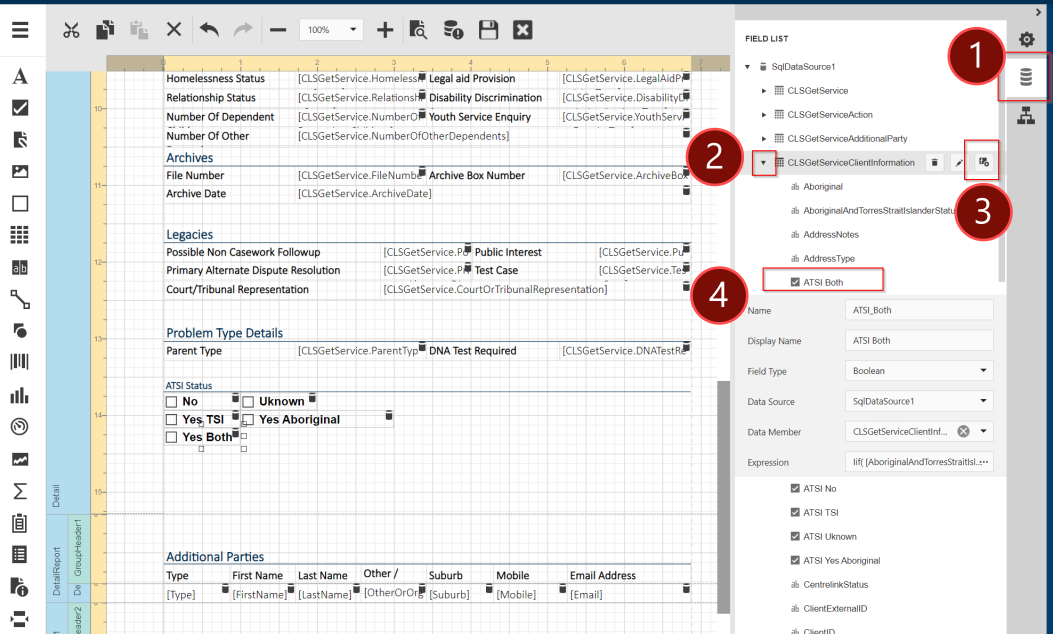
From the Fields List Menu on the right hand side:
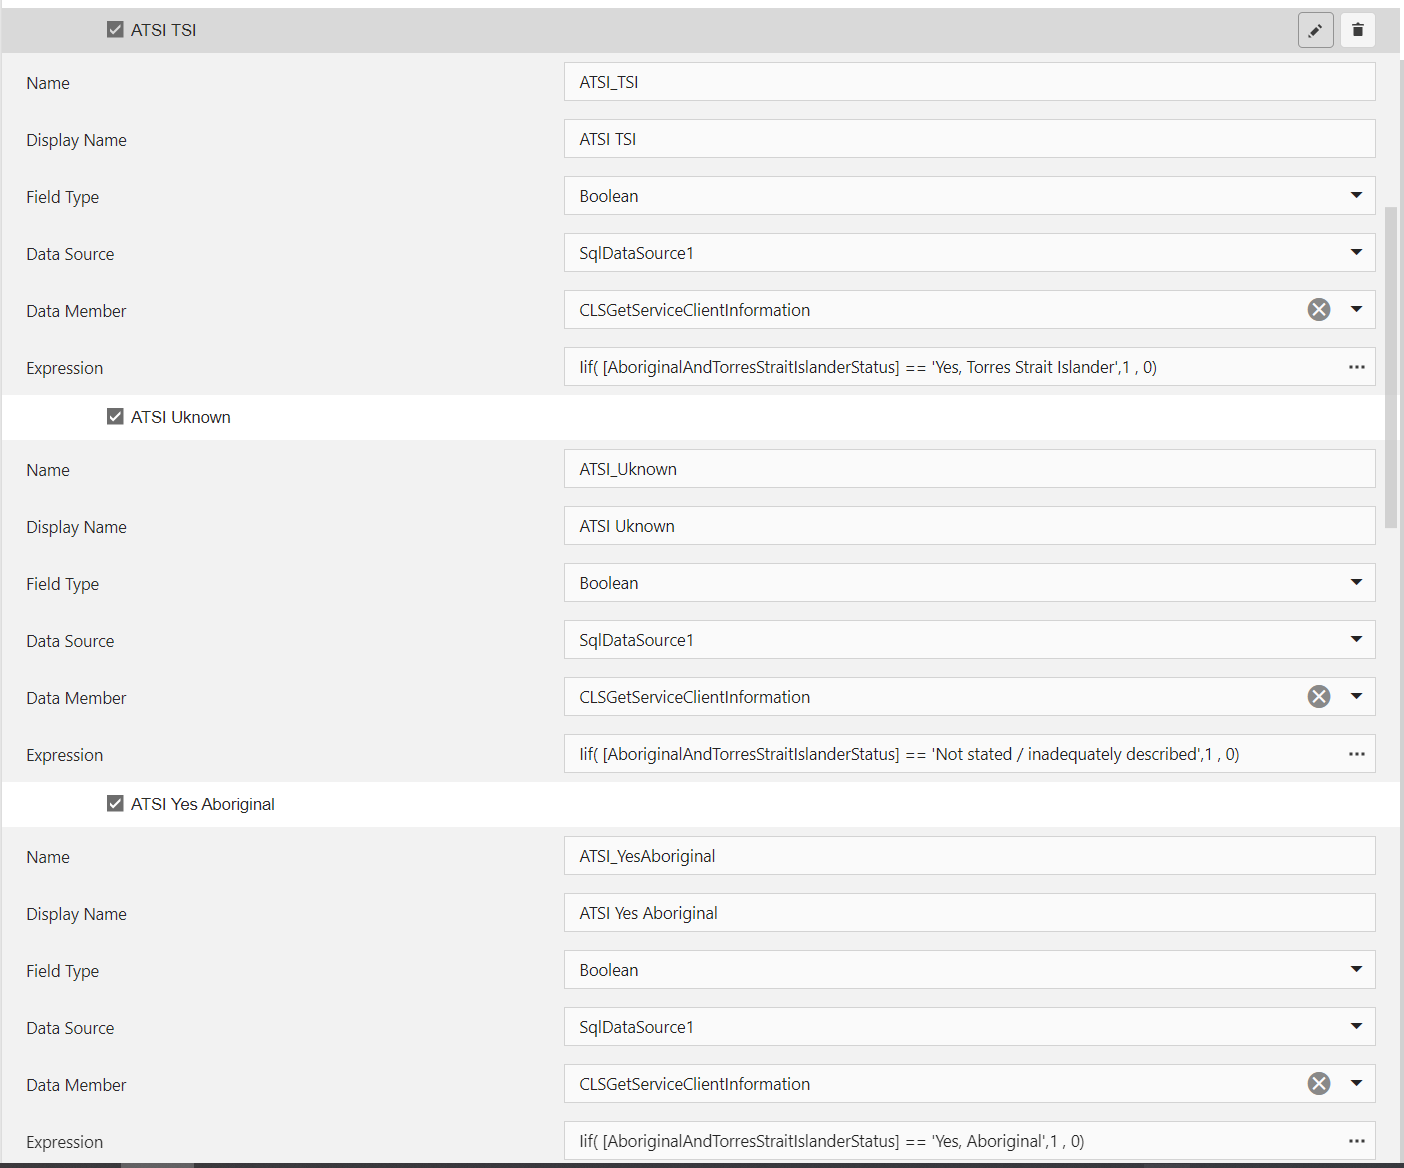
Remember in plain English the expressions in this case are just saying if my field “Aboriginal and Torres Straight Islander Status” is equal to a particular value i.e. Yes, Aboriginal I should be ticked (represented by the 1) and if it is not that value I should NOT be ticked (represented by the 0).
| Field | Expression |
|---|---|
| ATSI Yes Aboriginal | Iif( [AboriginalAndTorresStraitIslanderStatus] == ‘Yes, Aboriginal’,1 , 0) |
| ATSI Yes TSI | Iif( [AboriginalAndTorresStraitIslanderStatus] == ‘Yes, Torres Strait Islander’,1 , 0) |
| ATSI Both | Iif( [AboriginalAndTorresStraitIslanderStatus] == ‘Both Aboriginal and Torres Strait Islander’,1 , 0) |
| ATSI Unknown | Iif( [AboriginalAndTorresStraitIslanderStatus] == ‘Not stated / inadequately described’,1 , 0) |
| ATSI No | Iif( [AboriginalAndTorresStraitIslanderStatus] == ‘No’,1 ,0) |
tba


Community Legal Centres Australia acknowledges the traditional owners of the lands across Australia and particularly acknowledges the Gadigal people of the Eora Nation, traditional owners of the land on which the Community Legal Centres Australia office is situated. We pay deep respect to Elders past, present and emerging.

Community Legal Centres Australia is a proudly inclusive organisation and an ally of the LGBTIQ+ community and the movement toward equality.
ABN 67 757 001 303 ACN 163 101 737
Disclaimer | Privacy Policy
© Community Legal Centres Australia 2022 | Designed by DropIn Solutions